Auto Reply Pro Add-on makes life simpler and productive for Gmail and Gsuite users. It helps automate sending Auto Responses to repetitive emails as well as send auto follow ups to emails needing regular hand holding to close sales.
In the Tutorial below we will guide you with how to activate the premium subscription, if you found the Add-on useful and decided to upgrade to premium subscription.
If you have not installed the Add on yet, then please Click here to install Auto Reply Pro Add-on from Google Marketplace
Login to your Gmail/Gsuite account. If the Add on is already installed, Click the Add-on icon in the Right sidebar as you can see in the below image. 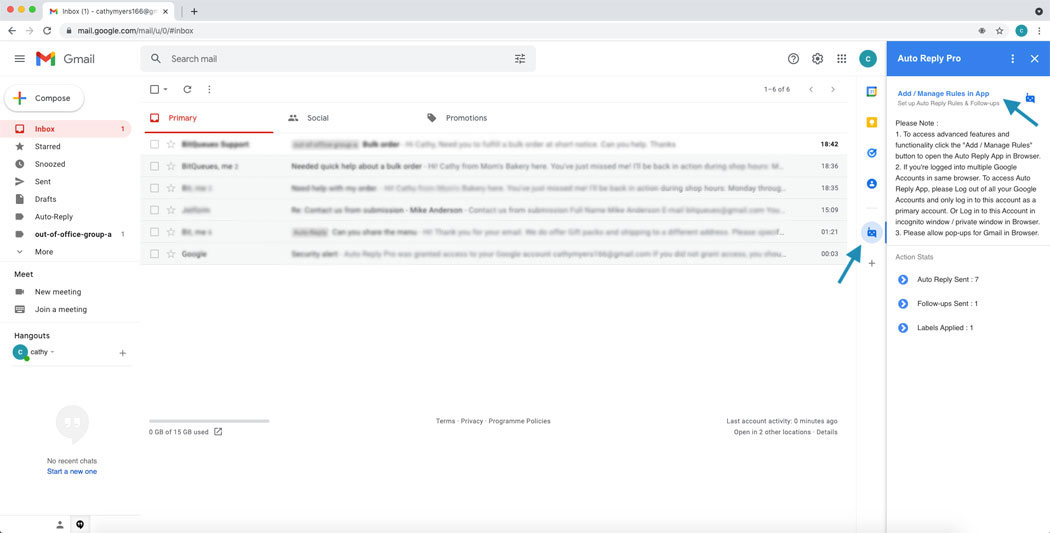
a) In case you notice a Pop up blocked notification, while trying to open dashboard from Gmail.
b) In the address bar, click Pop-up blocked see image below.
c) Click the link for the pop-up you want to see.
d) To always see pop-ups for the site, select Always allow pop-ups and redirects from [site] > Done.
In the Auto Reply Pro app dashboard on top right corner, click the account profile icon to access the menu. Please see that the email address is for the same account for which you wish to activate the license. If not, please logout and first login to the account you wish to use the Add-on for as primary account. 
Choose license info option from the items listed in drop down menu. 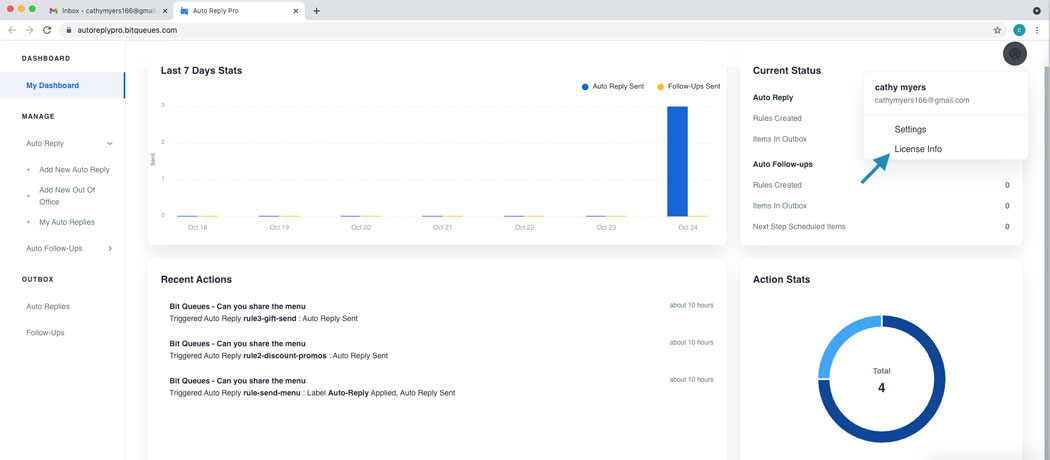
Now you are presented with license info page, with option like which license version you are on, buy a new license, Activate license etc. Click Activate license button. 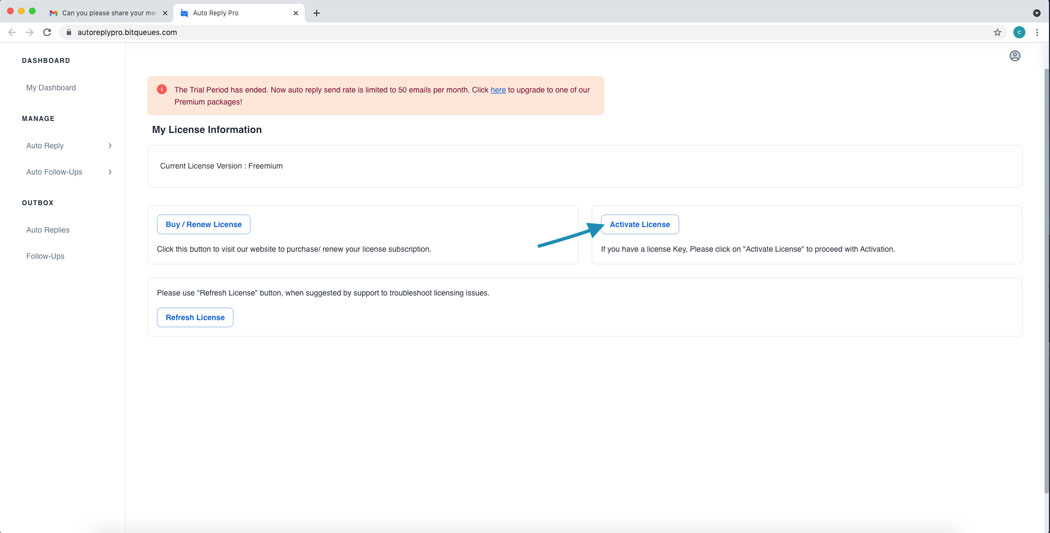
You will get a input box to enter the license key and a next button. Please enter or paste the license key presented to you at the end of order process or order confirmation email you received after completing your order online. Click Next.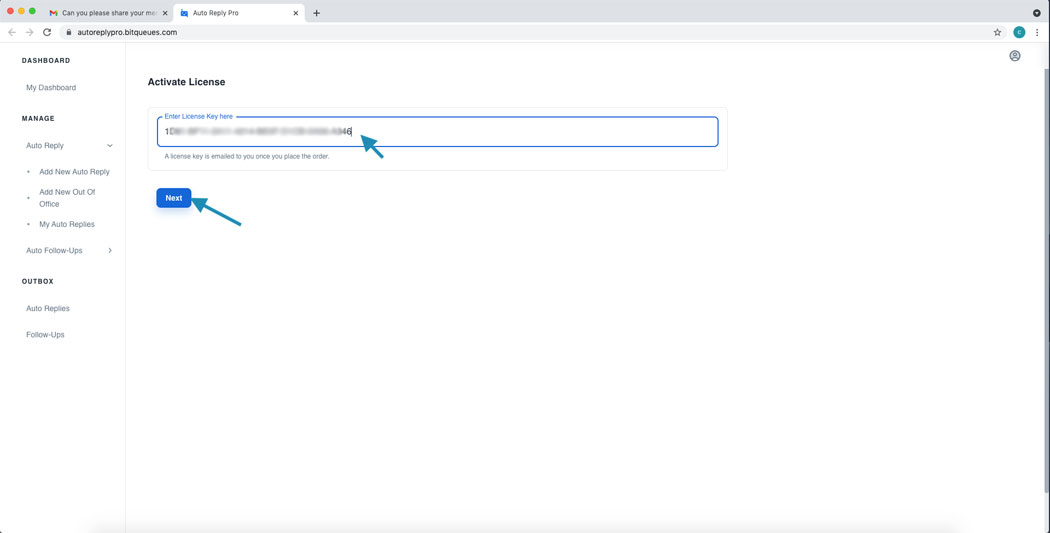
Before you proceed and activate, for your confirmation email address is displayed against which you are activating the license. Click Activate license if the information is correct.
Note: If it’s not correct account, please logout and first login to the account you wish to use the Add-on for as primary account. 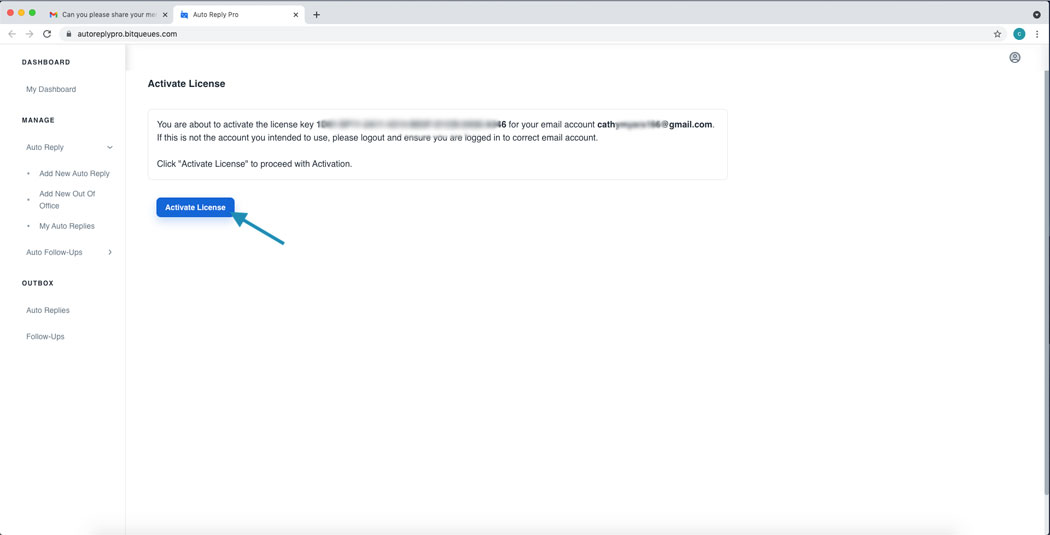
In case of domain license packs, the Gsuite domain name is displayed for which the license will be activated. Our license server is intelligent to manage the users. Domain admins after activating should just request users to refresh the app for the changes to take effect. No need to activate for each user separately.
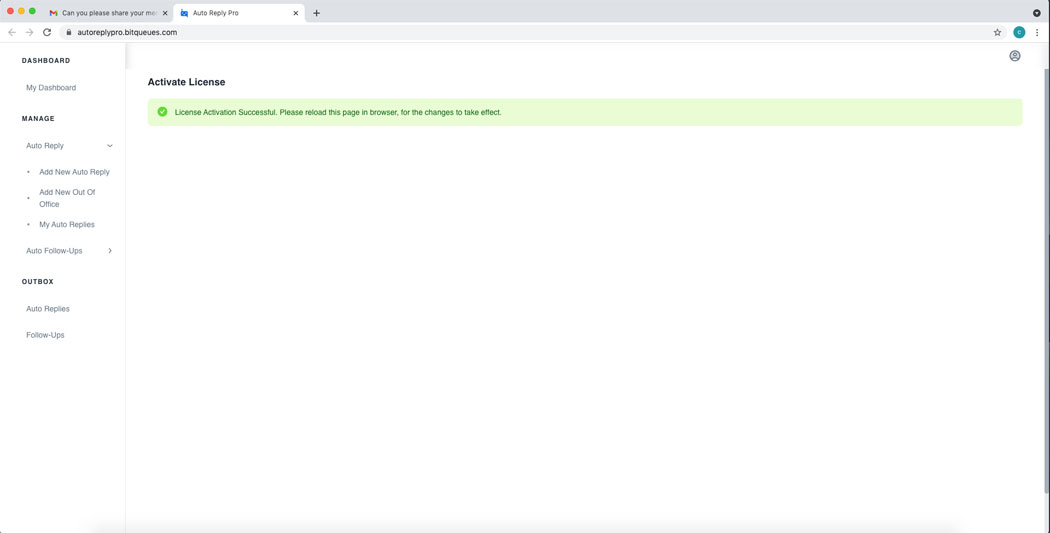
You will get the confirmation message, license is now activated. Please reload/refresh the browser window for the changes to take effect.