Looking for a way to Automate Yelp responses & improve your Response Time ratings in Yelp Business listings? Yelp Responder Feature in Auto Reply Pro Add-on for Gmail / Gsuite lets you create customised template responses which are triggered within minutes. Not only that, you can customize your first response based on words from the incoming message.
In the Tutorial below we will guide you about how to set up Yelp Auto Responder and improve your chances to close more leads from Yelp.
If you have not installed the Add on yet, then please Click here to install Auto Reply Pro Add-on from Google Marketplace .
Need help with installation? click here to read installation tutorial. Once, the Add-on is installed proceed to next steps.
a) To get started with setting up Yelp auto response click the Add / Manage Rules button to open the Auto Reply App in Browser.
b) If you’re logged into multiple Google Accounts in same browser. To access Auto Reply App, please Log out log in to the account as a primary account in which the Add-on is installed and you wish to use. Alternatively, you may Log in to this Account in incognito window / private window in Browser.
c) Please allow pop-ups for Gmail in Browser. Please read Step 2 about how to allow pop-ups in Gmail.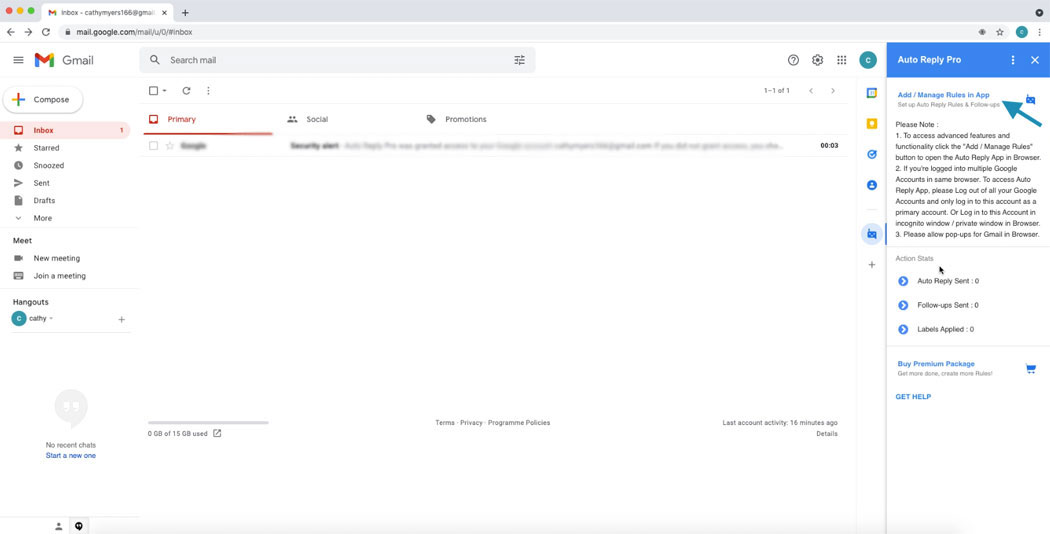
a) In case you notice a Pop up blocked notification, while trying to open dashboard from Gmail.
b) In the address bar, click Pop-up blocked see image below.
c) Click the link for the pop-up you want to see.
d) To always see pop-ups for the site, select Always allow pop-ups and redirects from [site] > Done.
Once you click the Add Auto Reply button, please type a name that helps identify this rule. Like we will name this Yelp AutoResponse 1, so as we can recall in future as to what this rule is about. Click next to move to the next step Set Conditions.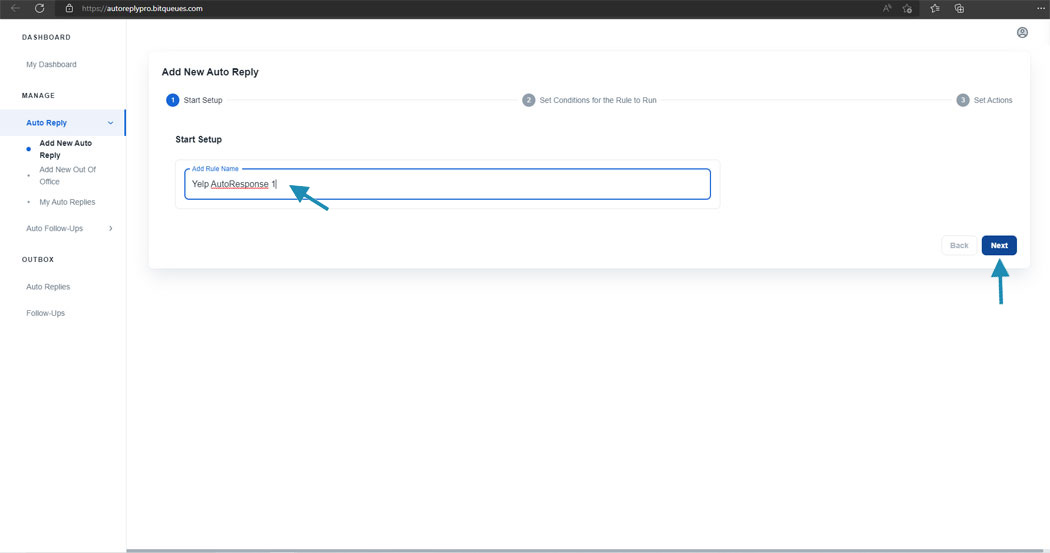
You can set multiple rules each with its own conditions to send more personalized and human response. To distinguish leads coming in from multiple business locations to the same email address. Please add condition: Any email received that contains any of these words in “Subject Field”: “requesting a quote , new lead” and click the Add button to add.
Optional Step: To be followed If you are adding business specific messages, please choose the condition below :
Any email received that contains any of these words in “Mail Message”.
Add Business name and address all together as this is unique for each business. In our test case Business name is Dream Palace Banquet Hall, 4522, Kings Lane”, So we are using “Dream Palace Banquet Hall, 4522, Kings Lane“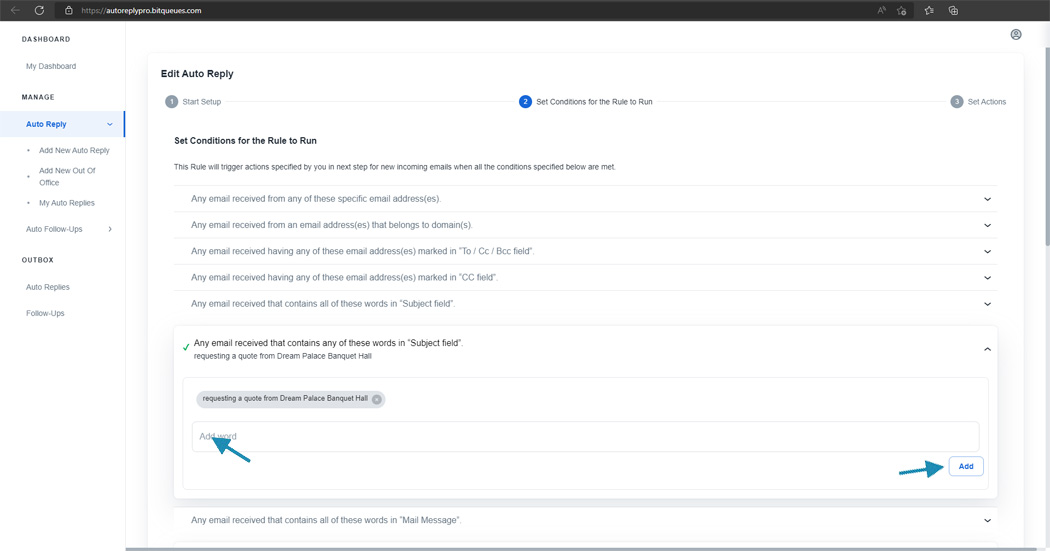
Worried if Auto Response will trigger correctly. No need to worry, just click the Test Rule Conditions button. It will show you a preview from last few days Yelp messages for which the Auto Response would have been sent. If all looks good proceed to next step of setting actions. 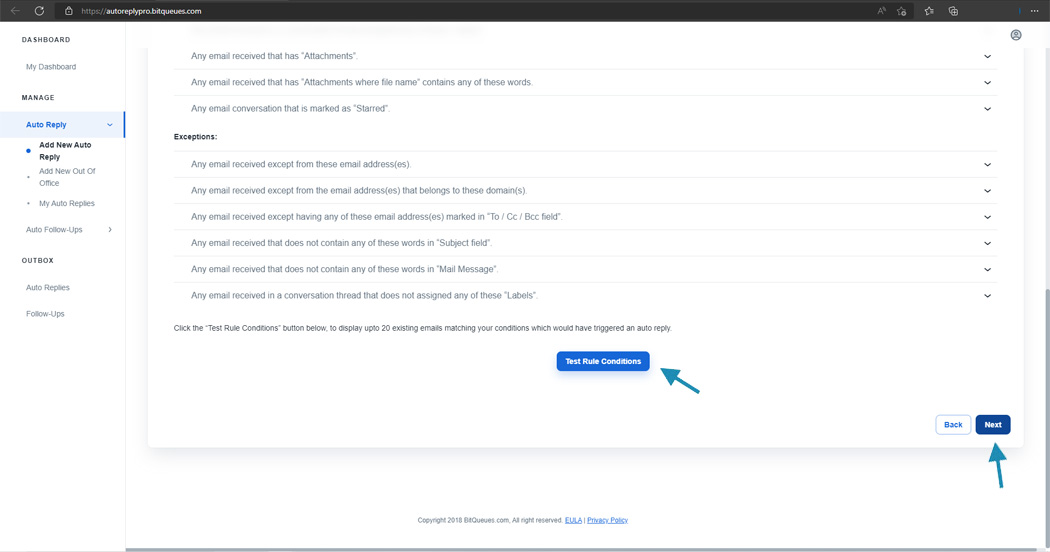
Click Add New Action button > And from the menu choose Reply to Quote Request Messagel Message.
Note: [ This feature is only enabled for trial users and any users past the trial period who have subscribed and activated Yelp Auto Responder License] 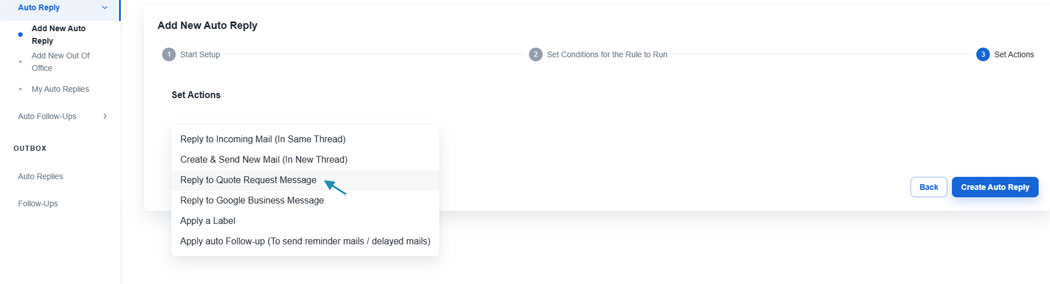
Now proceed to add the email content that you would like to send for incoming Yelp messages meeting your set conditions. 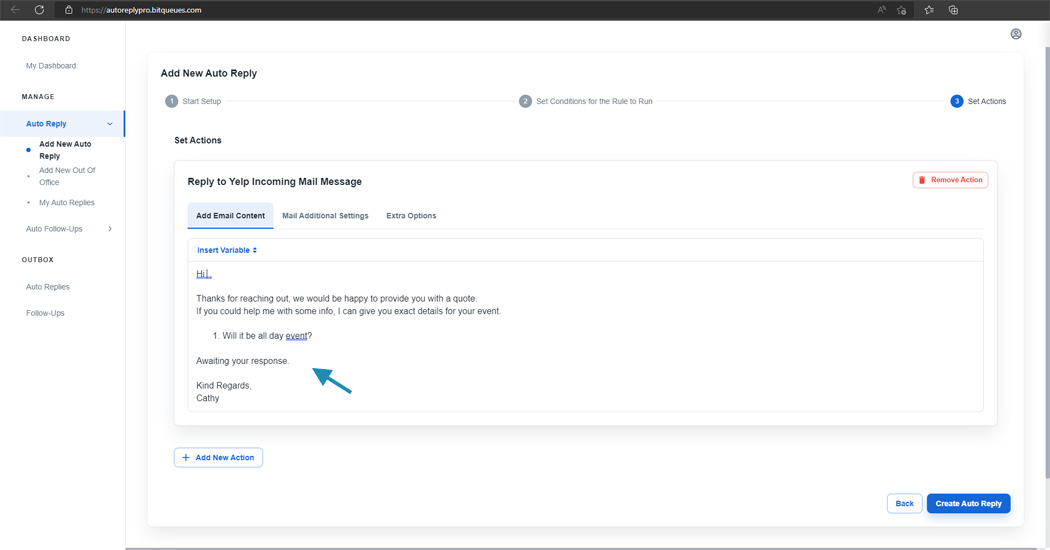
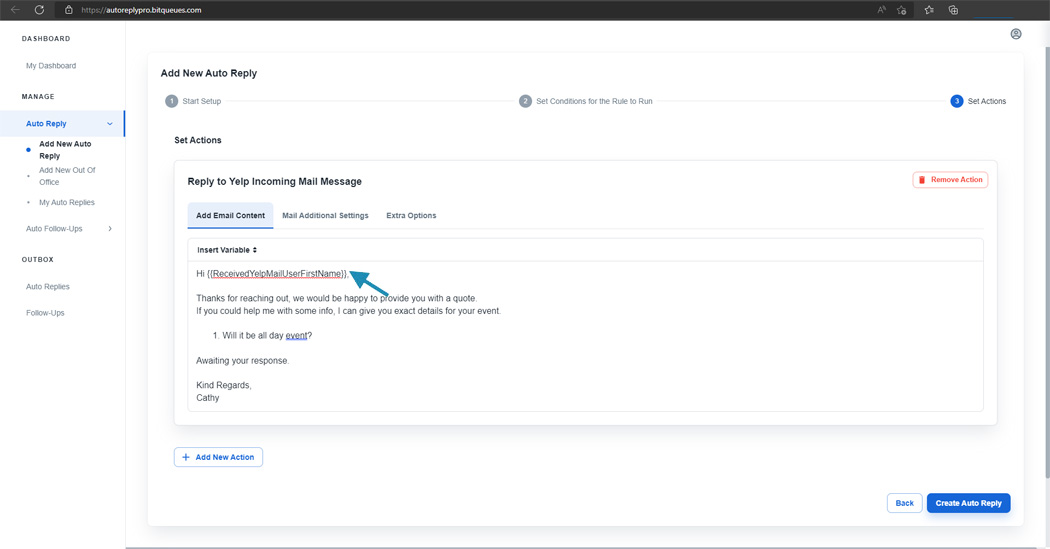
Auto Reply Pro allows you to further personalize the email content automatically extracting and adding the customer’s name from incoming Yelp message.
From the insert variable drop down select {{ReceivedYelpMailUserFirstName}} in the email template content where you would like the variable to populate. 
You can set senders name as your business name. You can also add Additional recipients to the response by adding their email address as To, Cc, Bcc field.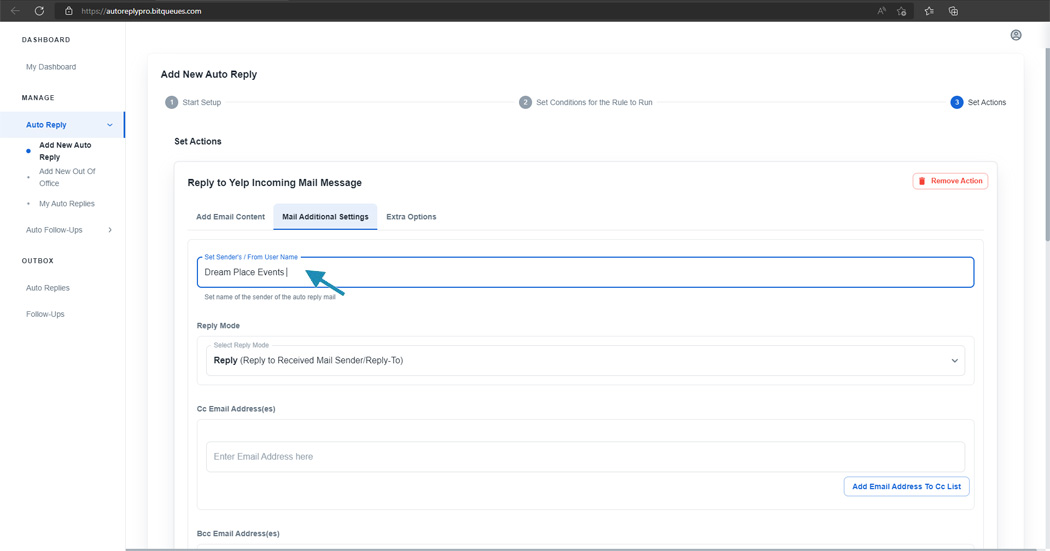
You may choose to set some extra options like adding a label to Auto Response emails for easy identification or to organise emails. If you haven’t created any labels yet, you can create in Gmail interface and click Reload labels button to choose from the list. 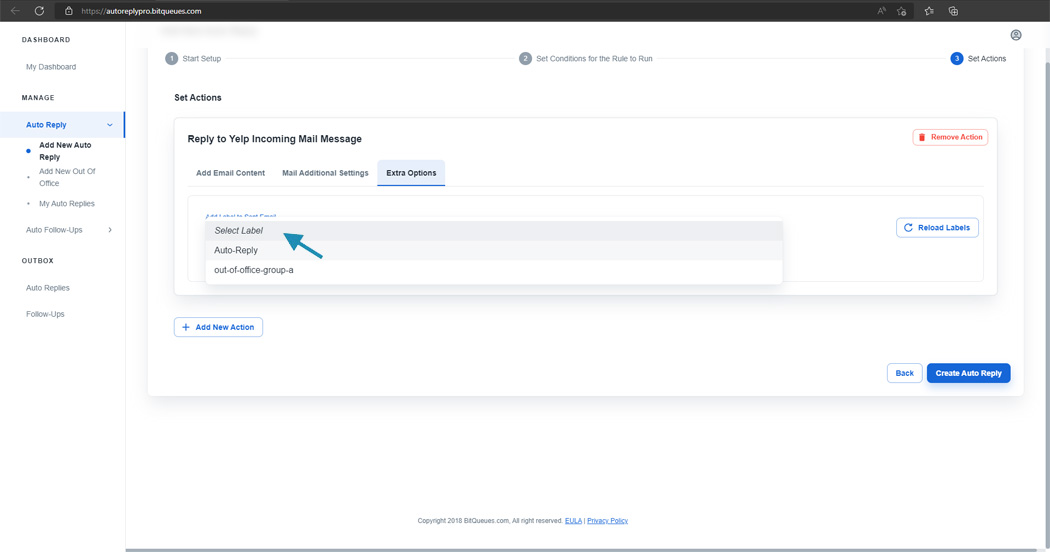
Not just that but you can check the option, Mark received email as Read after Auto Reply is sent to keep your mailbox organised. 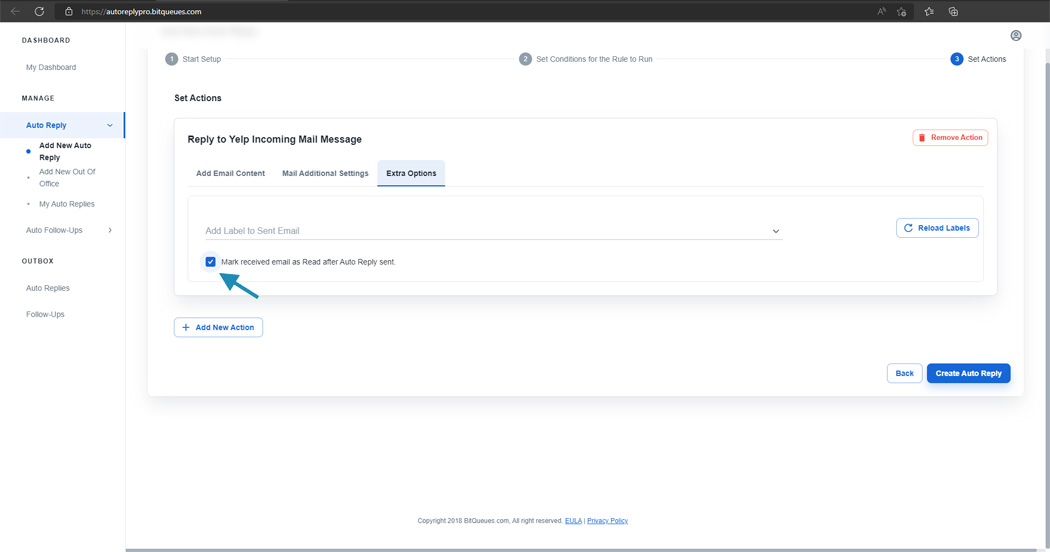
Click the Create Auto Reply button and we are finished setting up our Yelp Auto Responder in Gmail.
Auto Reply Pro lets you do more by making your responses as precise as possible to help make your client take an informed decision, thus increasing chances of closing a sale. This is the edge you will always have over your competition. By adding more rules, which are executed in sequence. So, let’s say you have one rule set to respond to incoming emails containing words Birthday, Party. You can set one more rule with an entirely different response for emails containing words Wedding, arrangement.
Tip: Please keep more complex scenarios up in the order and more common scenarios in the end. As the rules are executed in preference of sequence.
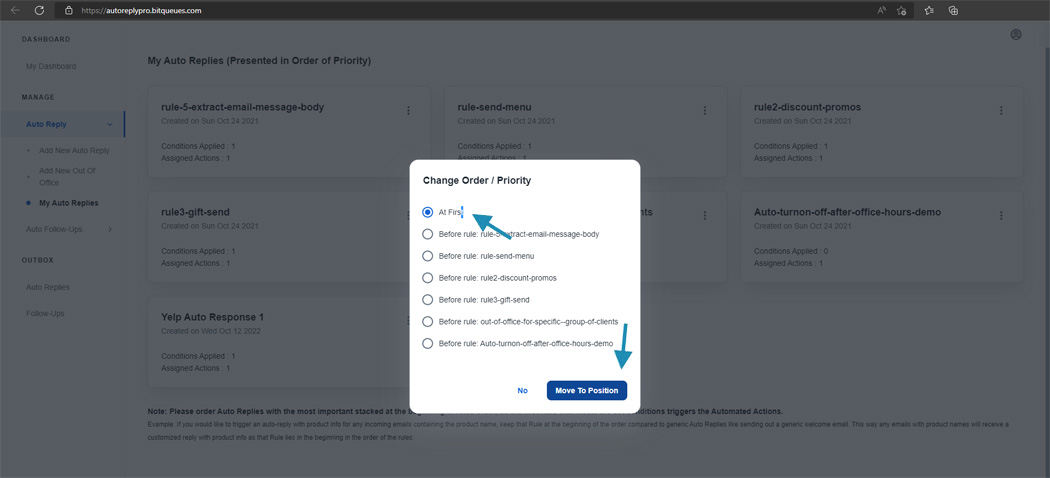
We can add another rule and move it up the stack order to send more personalized response to a message meeting a more complex condition. For example: We can create one more rule and add one more condition to the one already added in the above step, if the mail message contains any of these words and add word “Birthday”, we can have a different email template sent as response, giving more details related to Birthday Party. And move the rule up in order, as explained in the end of the tutorial. 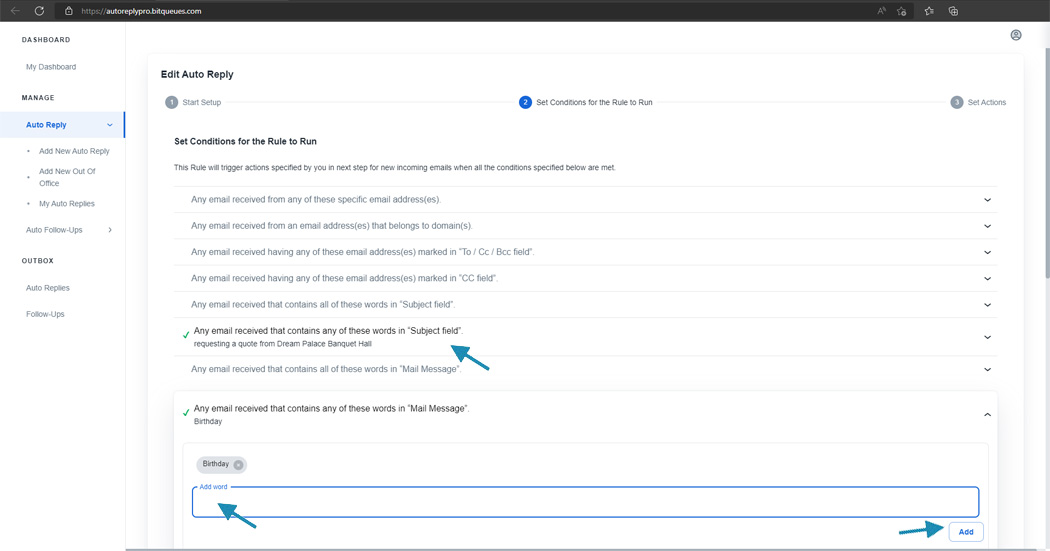
We can create one more rule and add one more condition to the one already added in the above step, if the mail message contains any of these words and add word and instead of the word “Birthday”, we add “Wedding” and assign a different email template sent as response, giving more details related to Wedding arrangements and Booking Rules. We should always have complex rules up in order as these should trigger first compared to basic rules which applies to all responses. This way only messages meeting the complex condition would receive the info related to that case, rest will receive the basic common response. 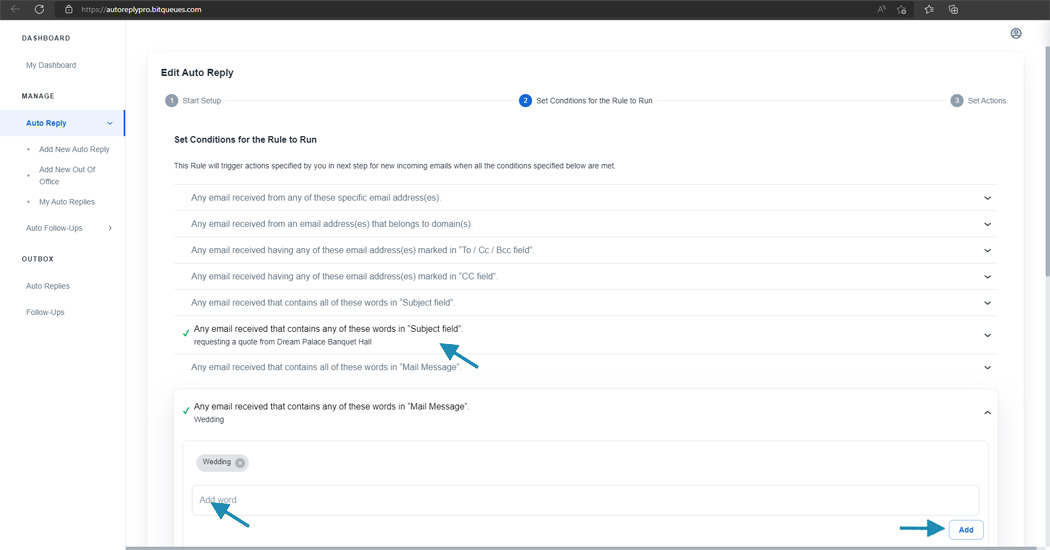
New rules have been added to the list of rules.
For example, if you have a complex condition like email content has words and email is from a specific domain in a rule. Keep that in front of a rule with very generic condition like send auto response if the mail contains a specific word. This will help the Add on to check the conditions in complex to simpler order and increase the chances of sending a very specific and relevant response.
You can click the three dots icon displayed in right far side next to the rule name in each card and choose Change/Order Priority. 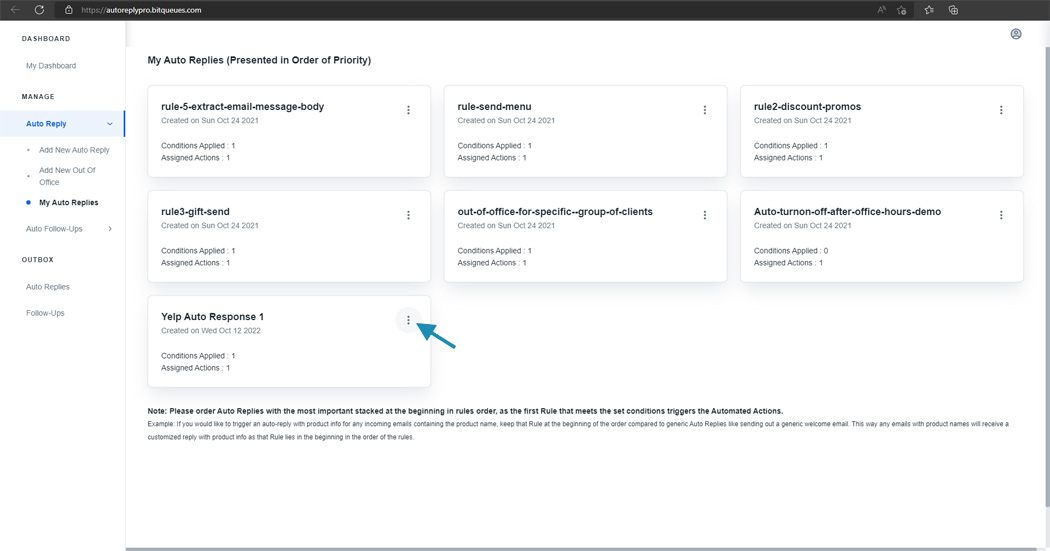
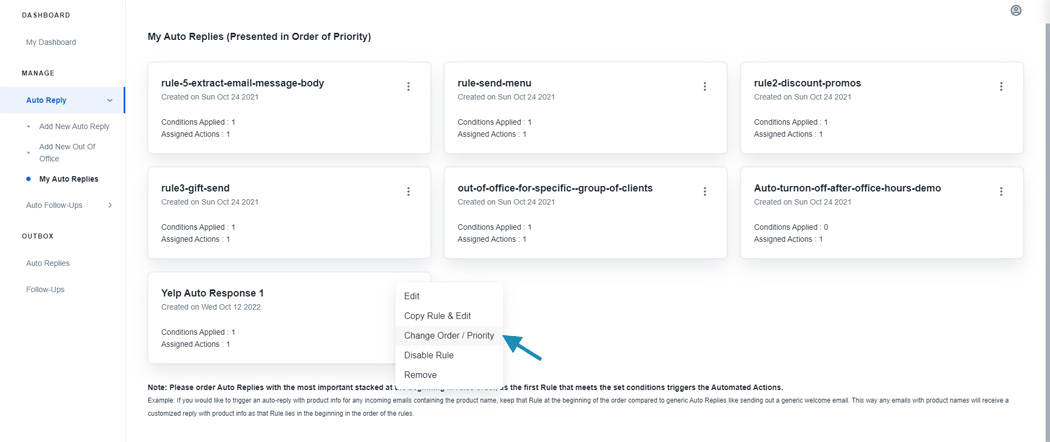
From the left side bar menu Please follow the path Auto Reply > My Auto Replies. This should list all the existing Auto Replies you have created and click the three dots icon on the right side next to Auto Reply name. You will get Disable/ Edit / Remove options.
Get Assistance with Setup from our Experts!